Upgraded the glass on the .300 Win Mag

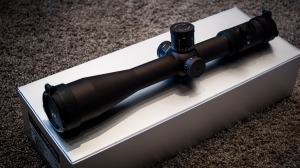
So Vortex quit making the 35mm Razor HD riflescopes in favor of their new Razor HD Gen II 34mm scopes. These are silly expensive scopes that I have always considered out of my comfort zone on what I want to pay for glass. Without a doubt they are both amazing scopes. But I always figured I am not good enough to justify such an expense. And even if I was good enough, the thought of spending the $2500 – $3200 that these cost, just made me nauseous. It is a weakness I have. I have a lot of experience in machining and manufacturing on an OEM scale and therefore I know what things cost to make and what they should cost to buy. Or at least I have a very good idea. And when things fall outside of what I think they should, the thought of spending that much money on them makes me nervous.

That gives you some background so you can see where I am coming from. As I am sure you have already figured out, I broke down and bought one of these amazing examples of precision glass and fine craftsmanship.

A couple months ago, I went to the range with a friend of mine in from out-of-town. I was testing out the wife’s gun for reasons unrelated to this story, but my friend brought his gorgeous AR-10 with a Vortex Viper PST FFP. I don’t remember if it was the 4-16×50 or the 6-24×50 variant. But regardless, the glass was impressive. I have the regular Vortex Viper 6.5-20×50 on one of my rifles and I have always liked it. However, his PST FFP was in a whole other range of quality. I figured that would have to be my next purchase once I had a need for a $900 scope. Well, all my guns had scopes. Their price/quality levels range from $80 – $900. BTW, the $900 one is a Leupold that I used to think was great until I looked through my friend’s PST FFP of the same price level. Anyway, once that range trip was done, I kept an eye on those PST’s waiting for the price to drop.

Vortex Razor HD 5-20x50

Vortex Razor HD 5-20×50

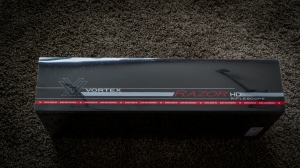
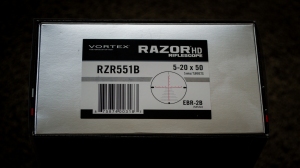
As luck would have it, Vortex decided to quit making the Razor HD and their prices plummeted accordingly. Of course, you had to find one in stock somewhere as more could not be ordered. And I happened to find one for less than ½ the MSRP. I couldn’t say no. This opportunity would not come around again anytime soon. So I pulled the trigger (pun intended) and bought the Razor HD 5-20×50 MRAD with the EBR-2B reticle. As a side note, Vortex only lists a 10 MRAD per rotation turret for this model. But my packaging shows 5 MRAD. According to a video on Vortex’s site, the difference between the scopes is just that each rotation makes a larger adjustment with the 10 MRAD, but the overall amount of travel is the same. So mine will allow for finer adjustment, but will take longer to make large adjustments. I’m cool with that since paper targets wait as long as I want them to.

5 MRAD turrets

5 MRAD turrets

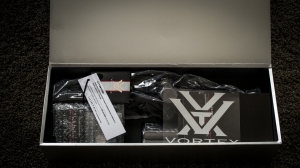
Even the packaging is fancy. I wonder if this stems from the Japanese origin of it.

Even the packaging is fancy. I wonder if this stems from the Japanese origin of it.

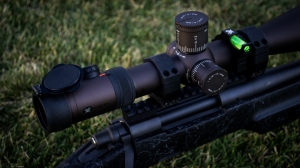
Even comes with a bubble level, sun shield, and honeycomb filter thing

Even comes with a bubble level, sun shield, and honeycomb filter thing

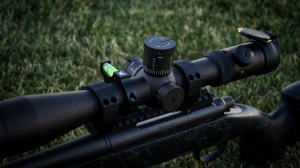
The Razor HD is FFP, or first focal plane. My understanding of this is that it scales the reticle accordingly as you increase magnification therefore allowing you to range targets the same regardless of magnification. One thing I found really cool with FFP, especially with this EBR-2B reticle, is that as you zoom out (decrease magnification) the reticle is so fine that it almost looks like a fine duplex reticle, but as you zoom in all of the other busyness becomes apparent. The Nightforce reticles are a bit finer, but honestly, I think they are a bit too fine at times. Depending on the background it can be hard to see them. And the Vortex reticle is still very fine.

Love this color

Love this color

The Razor HD compared to the PST has the premium HD extra-low dispersion glass where the PST has their XD extra-low dispersion glass. I was reading about HD glass versus other glass on a benchrest shooting news site and it has something to do with the wavelengths of light it lines up covering all wavelengths rather than just most of them or something along those lines. I would look into it further for you, but what is important, is that it is the best you can get in riflescopes. Yes, there are other things that set some apart from others, but what HD is designed for, it is the best at. Most other differences between the two are aesthetics and ergonomics, save for a couple more things. The tube is 35mm diameter, which has a much smaller selection of available rings to choose from. Also, The Razor HD is made in Japan rather than the Philippines.

Side parallax adjustment. Nothing special, but there it is.

Side parallax adjustment. Nothing special, but there it is.

Now onto my use for this baby:

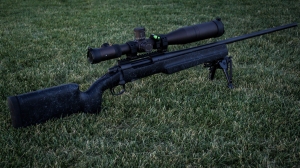
The obvious choice for gun to install it on is my .300 Win Mag Remington 700. This gun has the Bell & Carlson Medalist Style 2 stock, a Rifle Basix trigger, a Shooter’s Ridge bipod, and EGW 20 MOA Picatinny rail. And now, the Razor HD scope and Vortex high mount rings.

The B&C Style 2 stock is black with grey webbing. It has a nice pronounced palm swell and an aluminum bedding block in it. It also has a Pachmayr Decelerator pad, a nice wide forend, a vertical grip, and a high comb for easier cheek weld. The Rifle Basix trigger is a drop-in trigger assembly for the Remington 700 that has a nice crisp break with no over-travel, and it is set to about a pound of trigger pull weight. Smoove like butta. The EGW Picatinny rail is the 20 MOA variant which means it mounts the scope heading up-hill a bit for long range use. I pulled it off and applied some Loctite and torqued the screws to 20 in-lbs prior to installing the Vortex, per EGW’s specifications. The Bipod is a Shooter’s Ridge 6-9” pivoting model. It has been great. I have not liked the Harris bipods I have used in the past, and even though this has a similar design, it seems to work better and for 1/3 the price. The scope rings are Vortex 1.26” high 35mm precision matched rings. I hear they are made by Seekins Precision, which makes a few components I chose for my latest AR-15 build. And looking at the rings Seekins offers, they do look identical other than the logo cut into the top of them. These rings are expensive, but then again, so is the scope. They are matched to +/-.0005 tolerance. They don’t specify which dimension this applies to, but I have an idea 😉 BTW, the rings are torqued to 18 in-lbs in a cross pattern as specified by Vortex. Now this gun just needs a barrel. The stock one has performed well. But it looks so dinky. But that is not in the budget just yet.

Remington 700 by me :)

Remington 700 by me 🙂

Remington 700 by me :)

Remington 700 by me 🙂

Remington 700 by me :)

Remington 700 by me 🙂

I have been loading 200gr Sierra Matchking bullets for this. My magic load that gives me the best accuracy is 66gr of Hodgdon 4350 powder with Magnum large rifle primers with an OAL of 4.513. This is not the fastest I tried loading, but was by far the most accurate for me. Like ½ the group size of any other load. I will be developing a new load however using Hodgdon 4831 as it seems this powder is more suited for the heavier bullets I am using and also, the 4350 has been very difficult to find around here, but I have been able to obtain plenty of 4831. I may try the 210gr bullet as it ups the B.C. from .565 to .645. Or, I may just go the Berger VLD 200 as it has a B.C. of .624 which is significantly better than the Sierra 200, and almost as good as the 210, but may be able to fit in my detachable magazine better.

66gr Hodgdon 4350, LRM primers, Sierra Matchking 200 gr

66gr Hodgdon 4350, LRM primers, Sierra Matchking 200 gr

As always, click the pics for bigger versions. And as usual, sorry for the slow progress on this blog.
Update on the STi

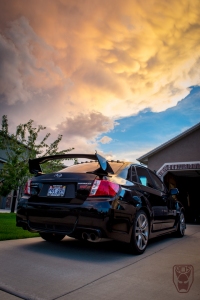
Opposite direction of the sunset.

Opposite direction of the sunset.

At lunch a couple weeks ago I noticed a huge door ding in the front driver side fender. Luckily I caught the guy that did it and got his insurance info. His insurance paid to fix the fender. The place I had fix it quoted me about $100 less than what insurance paid to fix it. So I had them put some satin black vinyl over the chrome strip that has bugged me since day one on this car. It bugged me enough I almost bought another car instead of an STI just to avoid the chrome. Unfortunately, it seems nearly every car manufacturer has decided all consumers are either Mexican or 70+ years old and want chrome. Well, I got the car back a couple days ago and while I was sitting here at the computer not doing homework, I noticed the sunset was making some cool lighting and decided it is time for some photos.

Bye bye old man chrome. Wish I had the older STi headlights.

Bye bye old man chrome. Wish I had the older STi headlights.

I was shocked how much more I love my car now that the chrome is gone. I knew I hated the chrome. Always have. But I have a renewed excitement for driving it and modifying it now. Prior to the fender dent I was very meh on the car. Nothing about it excited me anymore. Now all of a sudden it is a fun car again. And now that I have my coilovers for it, I will start to make it even better to drive. Crazy how sometimes it is the little details that make all the difference.

Sunset over the house

Sunset over the house

And as further proof of my lack of excitement prior to chrome removal, look how many pictures of the Subaru I have posted prior to this post. I bet I have more pictures in this post than all other combined. Yet the wife’s Mazda and my old Mazda and even my old 350Z had a significant number of picture posts dedicated to them. Anyway. Back to the eye candy. Man, this sunset was cool.

Into the sunset

Into the sunset

Stupidroo-1Stupidroo-1-2Stupidroo-1-8

Our new Autocross Mazdaspeed3 project

I know it has been forever since I update the blog. This is not a catching up post. This is more of a project intro post. The wife wanted to have a fun car that gets better mileage than our Honda Pilot (13mpg around town). We have also found we have a need to tow heavier things. So we traded in her Honda in exchange for a slightly older Infinity QX56. This got us room for the kids and much increased tow capacity. This also freed up some money to get a fun car. The only requirements being that it is relatively competitive in an autocross class, and that it have 5 seat belts, and that is gets more than say 18mpg.
First we looked at some E36’s. Then an E46 M3. And we looked at some Audi’s and other cars that just didn’t quite fit the bill. She has wanted a MazdaSpeed3 for quite some time due to the fact I designed a bunch of stuff for it. But they always sold for crazy high dollar amounts given their age and condition. But we ended up finding a 2008 with a salvage title with just 56K miles for a lot less than others with 120K+ miles on them were going for. The salvage title can be iffy. But given the lower cost and the fact we are going to beat on it anyway, it seemed like a good idea at the time. Hopefully it pans out. So far, so good.

I did not get any pictures of it stock. We bought it on Saturday, autocrossed it in STX on Sunday. I was 4.2 seconds out of class lead. I didn’t feel that was too bad given it was a stock car on crap tires that we owned for about 12 hours prior. Also, I have not done any serious autocrossing in over a decade I think. Luckily for the wife, timing screwed up and they gave her my fastest time. So the official results show her as the fastest girl there. She was not happy about that, but I got a giggle out of it. Turns out I only beat one guy in an R32 in STX. But it was a small turn-out. Back when I used to autocross, over 100 competitors was the norm. Now, it seems 50 is huge. Not sure what caused it, but I have my theories.

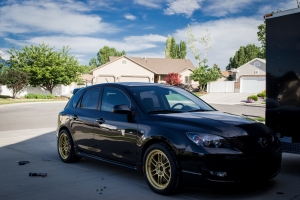
New gold Enkei RPF1 +45 with Hankook R-S3 255/40-17 tires

New gold Enkei RPF1 +45 with Hankook R-S3 255/40-17 tires

This week I ordered a few of the autocross essentials for it. Tires, wheels, coilovers. This is not meant to be nationally competitive or expensive. Just a fun project for the wife to have her fun in and get even better at driving with, yet still truck the kids to school every day. Obviously coilovers are not here yet so it sits like a monster truck. And I just took these pictures during a test fit. We still have to roll the rear fenders before these wheels will fit. But hopefully, I will be updating my blog more regularly since I have a project to report on and keep a photo record of.

Another angle of the Enkei test fit

Another angle of the Enkei test fit

Wheel specs: Enkei RPF1 17×9 +45 gold. They weigh 15.7 lbs. The stock wheels are 18×7.5 +52.5 I believe and weigh about 25-26 lbs.

Tire specs: Hankook Ventus R-S3 255/40-17. Stock are 215’s so this is a huge increase in meat touching the ground.

With stock suspension on there, the wheels clear the front strut by less than my finger width. I folded up a piece of paper several time and ran it through the gap and it was fine. So it has probably 1/4-3/8 clearance. It clears the brakes by much less than that. I would say there is maybe 1/16″ clearance there. On the rear, there seemed to be plenty of clearance to the suspension and brakes. But man, I hope that camber curve is aggressive because even with a roll, I think clearing the fenders will be tight. Also, after crawling under the car to check clearance I see it has a red tubular rear anti-roll bar. I assume it is a Hotchkis. It was set to the soft setting. I got the tires and wheels from Tirerack. I could have saved about $80 by buying them separately from other sources. But then I would have had to pay for mount and balance which Tirerack includes for free. Also, I ordered them Sunday. They were at my house by 11:00 a.m. on Tuesday. Tough to beat that.

As you can see, my picture background has changed. That is one of the many things that has kept me busy since last posting to the blog. Sold the old house I had been in for 9 years and moved to a new one with a 4 car garage. All while having another batch of puppies. Also, going to have my kids living with me full-time starting next week. Life is good.

Gratuitous B&W. Because art.

Gratuitous B&W. Because art.

More Great Dane puppy pictures

Not going to say much. It is obvious how adorable they are. They began to open their eyes at 10 days for Boba Fett and 11 for Han Solo. And last night at day 13 they walked for the first time. This typically involved walking about 4 step then plopping their rear down. Han Solo could walk a little further since he doesn’t have quite the girth to carry around. They still are making cute puppy grunting noises and doing a lot of sleeping and eating.

Now onto the pictures, sorry about the quality. On-board flash is not so awesome, and they wiggle around too much to not use a flash:
Boba N Han-1Boba N Han-1-2 Boba N Han-1-3 Boba N Han-1-4 Boba N Han-1-5 Boba N Han-1-6 Boba N Han-1-7

Puppies!!!

The morning of October 21st, Heidi was acting a little lethargic. We figured puppies must be coming early. They did not come that day. So I figured she is due Thursday, so I better get a webcam setup as I had a seminar I couldn’t miss. So I downloaded icam. It is an app for smartphones that allows you to check in on your webcam and lets you stream it or have it motion activated and allows up to four cameras to run at the same time. So we set up 1 camera looking over Heidi and I went to my seminar. Crushing Circuit Operation and Maintenance. Yeah, I know you are jealous…

Anyway, shortly after 8:00 on October 22nd, Heidi had already bailed out of her whelping box. Camera showed nothing. But no sound was being picked up so I figured she just wanted a more comfortable spot to rest for the day. When I made the whelping box, I assumed 24″ tall sides would be enough to discourage her from hopping over the sides while about ready to pop. I was incorrect. Well, about 10:45 I started hearing something on the camera. Still no sign of Heidi. I sent a text to Cara to let her know Hedi was AWOL and that I was hearing noises. So she left work and came home to find 2 little puppies being washed off by Heidi on the loveseat. Gross! Oh well, luckily they are fake leather and clean easily.

4 hours old.

4 hours old.

This is Han Solo. He is skinnier than the other puppy, and such a looker. He will definitely be a lady killer. That brindle doesn’t show up well in photos as it is sort of dark inside and they move too much for slow shutter speed so I had to play with flash compensation to even get it this good. But in person, the brindle is more grey than it looks in pictures. And seems to get more grey toward his rear.

Puppy #2 at 4 hours old

Puppy #2 at 4 hours old

And here is Boba Fett. He is more adventurous, always heading out on his own, but then he gets all whiney and starts crying for mommy. He’s already more of an eater than Han Solo. And his coloring is crazy cool. Big Grey patches. So cute.

So after the 4 hours was up, Cara called the vet to see what they thought/recommended. They said it is unheard of for a Great Dane to have just 2 puppies. But they were closing soon so they couldn’t look at her and gave us the number for the 24 hour vet. Well, Heidi was acting fine, other than not wanting to eat or drink, but she seemed happy to have babies to take care of and would get up and go outside fine, provided we stole her babies. So we figured we would wait until morning to see if anymore came out and decide what to do with her.

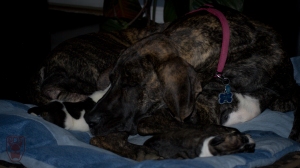
Sleeping on mommy's paw

Sleeping on mommy’s paw

In the morning, Heidi was acting even better, so we just setup the webcam so I could monitor her from afar. Silly girl was supposed to wait until this 3 day seminar was over. Well, everything on camera was fine all day. When Cara came home she took Heidi and the puppies to the vet to get checked on and dew claws removed. Everything checked out. No more puppies. So yes, we have a Great Dane that had just 2 puppies. We were totally expecting 6-8, but no. And yes, I know we could have had an x-ray, but the cost and risk didn’t seem worth it. She was going to have what she had and an x-ray wasn’t going to change that.

Only having 2 puppies definitely throws out the plan for new flooring for the house. And we will barely break-even. So don’t care. They are adorable and Heidi is an amazing mom. It’s crazy how much that mothering instinct is programmed into animals. As soon as they were born, she was cleaning them off, directing them toward food, keeping them warm, and protecting them from us. Such a good mommy.

Mommy and babies sleeping

Mommy and babies sleeping

In the pictures from today, the puppies have little blood spots where their dewclaws were. And here are some more gratuitous puppy shots. Because PUPPIES!!!!

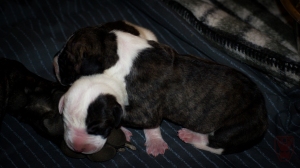
Han Solo laying on top of Boba Fett

Han Solo laying on top of Boba Fett

Han and Boba cheek to cheek

Han and Boba cheek to cheek

Using mommy's paw for a pillow again. Such tiny puppies.

Using mommy’s paw for a pillow again. Such tiny puppies.

Mommy checking on her babies

Mommy checking on her babies

Boba Fett sleeping like his daddy

Boba Fett sleeping like his daddy

Trying to push mommy away. She's a bit bigger though.

Trying to push mommy away. She’s a bit bigger though.

Heidi and Bob Fett cheek to cheek

Heidi and Bob Fett cheek to cheek

And of course, it goes without saying, click pics for bigger versions. I can’t wait to get outside pics with them. This indoor lighting is just horrible.

Building a Whelping box for our Great Dane

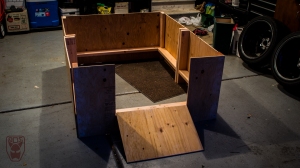
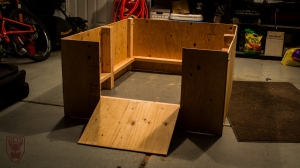
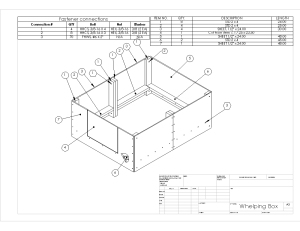
As I mentioned before, our little Heidi is having babies soon. Right now we are about 8 days from her giving birth. So a whelping box was required to keep Heidi and her babies happy and safe. And keep Odie out as much as possible. I sat down and spent 20 minutes or so throwing ideas down on Solidworks. Once I had the winner, I created a quick weldment so I could have a cut-sheet. I could have made it an assembly and put the hinges on and screws in and that sort of thing. But after considering it for about half a second I decided that was overkill. So, if you like my idea, feel free to rip it off. The more the merrier.

Whelping box plans

Whelping box plans, click for full size.

Now this box is for a Great Dane. So it needed to be slightly larger than a usual whelping box. However, when checking out youtube and doing research, I decided all of them I found were either made too small out of convenience and made at 4′ x 4′, or they were way too big to keep that puppy den feeling for the pups. So I decided to make this one 4′ x 5′. And yes, I think that extra foot of length is both significant and necessary. Also, Most of the whelping boxes I found were screwed together permanently. Sure, you can unscrew them, but re-screwing wood screws into the same hole will become ineffective in short order. So I made this one come apart for storage and shipping if we have to move the puppies and mommy elsewhere. I think it turned out well. I used 3/8″ bolts which are way bigger than necessary, but make it so both metric and standard tools can be easily used. Another complaint I had of others I saw is that some weighed over 100 lbs. In fact one I saw installed a pulley system crane in their ceiling just to lift it up to clean it. No thanks…

We went down to Lowes and bought about $70 worth of wood and screws and hinges and such. I happened to already have some of the hinges and locks from a previous planned project I never made back in 2006. Luckily the girlfriend came across those in the garage just at the right time. Lowes will cut sheets 3 times for free. Which was perfect. I had them cut both sheets into (4) 2′ widths while we were there. Now my plans call for 1/2″ plywood sheet. Don’t do it. It’s a trick. I ended up doing 3/8″ because it was $15 a sheet rather than $50. And I needed 2 sheets. $50 a sheet would have destroyed my budget. Also, for 2×4’s I spent the extra $1 per length to get better quality ones. I highly suggest doing this. It doesn’t add much cost, but the boards are a lot more straight. As soon as I got home I started cutting the wood. Turns out I ended up buying an extra 2×4 I didn’t need. Oh well, I was in a hurry and not thinking math. Should have done my weldment a bit different and let Solidworks calculate that for me.

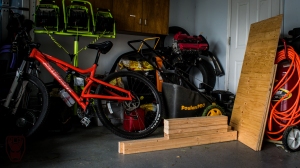
Pile of wood once cut

Pile of wood once cut

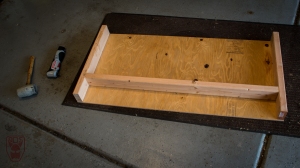
I let the wood sit overnight and acclimate. No, just kidding. I was tired of wood and wanted to wait. We will say it was acclimation though rather than laziness. By the way, I am terrible at woodworking. I can weld alright, machine steel or aluminum ok. But wood can suck it. It hates me ad I very much dislike it in return. So lengths were not super precise. And I ended up screwing a piece upside-down and another one backwards. But anyway, step one was to start screwing. I took what would be the back wall and used a c-clamp (get those quick clamp things, you will thank me) to hold the 2×4 onto the end of the sheet close to flush at the bottom. I screwed in some 2.5″ long screws, and did the same to the 2×4 on the opposite end of the sheet. At this point I put that assembly on the floor to add the pig rail. I was feeling rather proud of myself as the pig rail fit tight, but not too tight. Did I actually cut and screw more than one piece of wood properly??? I applied 2 screws to each end through the 2×4’s.

The back side

The back side

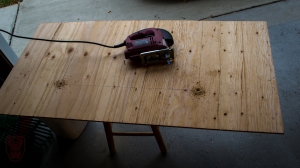
Well, that is the piece I screwed backwards. The ugly side of the sheet was to the outside. Oh well, still feeling it was a success. Flipped it over and put screws down the sheet to hold it to the pig rail. Next I took the other full length 2′ x 4′ sheet and drew the lines for the door on it. I drilled the bottom corners with a 3/8″ hole so I could have a start/stop point for the jigsaw. Then I proceeded to cut the least straight line you have ever seen a jigsaw make. Oh well, a little sanding will keep clearances large enough for door functionality…

Front side prior to cutting the door.

Front side prior to cutting the door.

Next step is for the 4 side pieces. They all ended up being a variant of this:

a couple variants make all 4

a couple variants make all 4

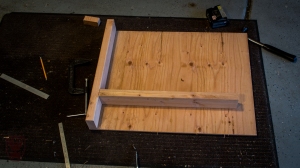
Once I made the first one I figured it was a good idea to number it and mark the drawing accordingly to keep track of which pieces I had made so I don’t end up having a pig rail across the top. BTW, I put the pig rail 5″ up from the bottom to the bottom of the pig rail. Smaller dogs will want this lower, bigger dogs (haha funny) may want it even higher.

I laid it out to make sure I had all sides correct and to make sure I thought the size was good.

Check construction

Check construction

I whipped out the c-clamp again, and the drill, and a couple hours after starting the project, I had this:

Bolted together for first time

Bolted together for first time

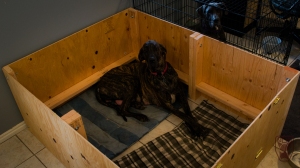
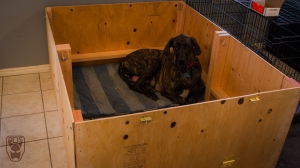
I then sanded it a bit and took it apart and stored it until tonight. After moving Heidi’s kennel into the garage we brought in her new whelping box for her to check out for the first time. The ramp door it turns out freaks her out a bit so she hops over it. But at least it’s easier than hopping over the 2′ sides 🙂

Heidi chilling in her new whelping box

Heidi chilling in her new whelping box

I think she likes it. And I think the size is just right.

I think she likes it. And I think the size is just right.

Puppies are coming

Our babies are of age. And while we were planning on waiting one more cycle before letting it happen, Odie had other ideas. So…

Our sweet little man

Our sweet little man

AND

Heidi Bug

Heidi Bug

Are going to be having a bunch of these:

Odie Week 2 Odie Week 5 Heidi 9 weeks-1 Heidi 9 weeks-1-2 Odie Week 1 Heidi (1 of 1)

Now for the stats:

Heidi is a AKC papered Great Dane. She is 32″ tall and weighs about 115 lbs (before puppy weight). As you can see, she is a reverse brindle (dark brindle). She plays hard and cuddles hard.

Odie is 75% Great Dane and 25% pitbull. His mom was 50/50, and his dad is a papered Great Dane. He got his color (blue) from his mom. She had a bunch of fawn (like their dad) babies and only a couple blue ones. He is about the same height as Heidi, maybe an inch or so shorter. He is very lean and muscular, but still only weighs in about 110 lbs. He’s the emotional protector, and of course always looking to play. When not bugging Heidi to play with him, he can be found laying up-side-down with his tail wagging. He is a big sweet goofball.

Puppies should be here around the 24th of October. And ready to go to their new homes right around Christmas time. Talk about an awesome gift. However, please don’t be that guy that gets a puppy when your significant other has no idea about it and turns out to not want it. That would break the hearts of the sweet pups. Also, both mom and dad have been checked by vets on a regular basis. They both have good hips and no health issues.

And for more doggy enjoyment, here is a few random pictures of them for you:

Just chillin

Just chillin

Like I said, he's the goofball

Like I said, he’s the goofball

Love to play

Love to play

Lovin on each other

Lovin on each other

Did I mention he's a goofball?

Did I mention he’s a goofball?

Latest JDM Legends meet

Last Thursday, JDM Legends had another one of their “First Thursday” meets. So here is a few pictures of some of the cars that were there. Unfortunately, I don’t have pictures of one of the coolest cars there as they don’t have pictures of it yet and didn’t want pictures to leak out before they had a chance to get it all wrapped up. As always. click for bigger versions.

The line-up

The line-up

Up front, you have a CA18DET powered Silvia, a few skylines, a Bluebird (510), a Datsun 410 (I think), A Celica GTV, the Starlet, and the old Datsun shop truck.

Skyline DR31

Skyline DR31

I think this is a DR31 Skyline GTS. But the cool thing (well, one of them) about this car is the front lip. That little dangly guy up front is powered. So you can flip it up at the push of a button.

Kenmeri Skyline

Kenmeri Skyline

“Just” a Kenmeri and a Bluebird.

Bluebird front badge

Bluebird front badge

Bluebird rear badge

Bluebird rear badge

S13 CA18det Silvia

S13 CA18det Silvia

This car made me sad and happy. Sad because I have been working on my CA18DET S13 all summer and can’t seem to track down a misfire or detonation issue. Happy, because this car was really nice. No dents on it and in great shape. It has a couple bolt-on’s but nothing extreme to make someone wary of buying it. JDM Legends has not decided on a price for this car. But if you want it, I would contact them soon as I hear employees have been lusting on it.

More of the line-up

More of the line-up

Datsun 410

Datsun 410

This thing was very cool. And I don’t know if I have ever seen a 410 in person before. And if I have, I know it wasn’t this clean. Such a cool little car.

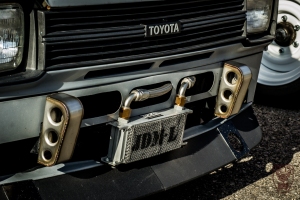
Starlet front end

Starlet front end

This is the JDM Legends manager’s (or whatever his title is) Starlet. I have always loved what he did for front bumpers and the oil cooler on this thing.

Celica hood vents

Celica hood vents

This is one of the vents on the Celica GTV hood. They are really cool cast aluminum pieces. You never see cool styling cues like this on modern cars.

There of course was a bunch of other cars there, but honestly, none of them were really doing it for me other than Brody’s R32 that he brought. But I didn’t really get any good shots of it.

Crazy sunset caused by wild fires

Over the mountains to the West of the house, sort of toward the racetrack a couple nights ago was a pretty good size fire. It made the skies go crazy cool colors. So I had to take a picture of the blood red sunset. Of course click to make the picture bigger.

Such cool colors in the sky that night

Such cool colors in the sky that night