OK, today was coilover day. I am not going to go into details on how to install them. These cars are seven or eight years old. It has been covered. I will however list issues I had as I seem to have had a couple minor issues nobody else mentioned.
Totally not the coilover’s fault, but I found on the driver’s side front I had a ripped CV boot and an endlink that had bad boots on both ends. So the finish of the install was delayed by waiting for an endlink to come in stock at O’Reilley. Luckily it was there 12 hours later.
Also, worth noting is I have read that some rear spring adjustment perches are mounted on the top and some are on the bottom. Mine happened to be the kind that mounts on the bottom.
Also, due to the wheel choice I made, I had to run some 5mm spacers on the front. Turns out I probably needed about 6mm on the passenger side. But I definitely didn’t want to go any thicker than the 5mm spacers I got due to Lug stud length. I am not even completely comfortable with the thread engagement I have with the 5mm spacers. BTW, I realized at the last minute that I needed spacers. So I went to Autozone, O-Reilley, & Napa. Napa had no spacers. The other two both had the same terrible cast aluminum spacers with no machining to make sure they are even flat. And the thinnest they had for my bolt pattern was 8mm. Luckily RallySport Direct had these nice machined KICS spacers in stock that I picked up this morning. They are still universal and not hub-centric. But an ass-ton better than anything those other stores had and only cost $5 more.
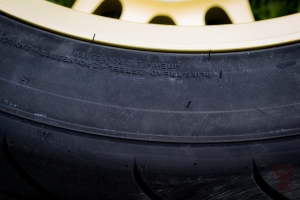
Even after installing the spacers, I had a rubbing issue which you can see on the tire in this picture:
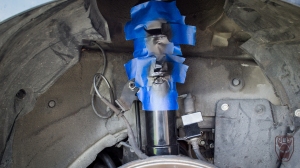
So I had to file off a little material from the coilover body. Then paint it:
Other that stuff, my only big complaint about the coilovers is, funny enough, something I praised in the last post about these. The top mount is recessed to allow for maximum camber adjustment without cutting open the hole at the top of the strut mount. Problem is, when you need to adjust the camber you have to drop the suspension and do some very time consuming trial and error.
After installing, I put the car on some scales and it came in with these numbers:
No driver, trunk full of spare tire stuff:
- 3,111 lbs total weight.
- 49.7% cross
- 50.1% left
- 63.3% Front
W/Driver, trunk full still:
- 50.1% cross
- 51.8% left
- 62.3% front
No Driver, trunk emptied of spare tire, jack, etc.:
- 3,060 total weight
- 49.8% cross
- 50.1% left
- 64.5% front
W/Driver, trunk empty:
- 50.1% cross
- 51.7% left
- 63.7% front
The scales are not mine, they are a friend’s so I don’t know how available they will be to me for future modifications. But these weights are with stock exhaust, stock intake, etc. So I may drop another 50 lbs. But I doubt it.
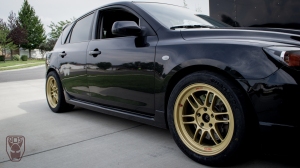
And here are the rest of the pics for today’s fun:


